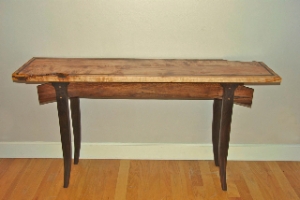
Tales of a Female Woodworker
As often happens in life, miracles are found in the mundane. I was living in Boulder, Co. in the mid-1990‘s floundering to find my place in the world, working, but unsatisfied and unchallenged.
My father’s basement had flooded over the winter, and in the springtime he needed help cleaning it up and fixing the woodwork. One beautiful, sunny, warm spring day I was outside sanding down a door and I was overtaken by an all knowing vision of what I wanted to do with my life. I know it sounds like a cliche’, but that is how it happened. I felt at peace and fulfilled fixing a door! I knew instantly that I was going to find a job at a cabinet making shop. And within about 2 weeks, I found myself immersed in a new culture of gruff, foul mouthed, child-like men, working long hours, to produce high-end cabinets for a boss who was afflicted with a small man’s insecurities and an eye for the bottom-line.
I still laugh when I think of the interviewing process for the position of “entry level cabinet maker.” I walked into the office, filled out an application, and where they asked for experience I clearly stated that I had used a hand sander, a router once or twice and could read a tape measure. The foreman, a young, large, possibly pregnant, mountain man named “Chopper” took one look at me and in his mind reflected on his present employee demographics of 30 men and 2 women who apparently suffered from a clear sense of gender identity and quickly said “your hired, when can you start?”
Feeling a little surprised at the lack of pertinent interview questions, I emphatically stated “tomorrow.” He then told me I would be making $6.50 an hour and work is from 6:00-4:30 M-Thursday and Friday until 12:00 (I am not an early bird). I suppressed my initial instinct to turn and run and indeed showed up the very next day for work.
Before working for, let’s call it Rocky Mountain Furniture, I was fairly thin, not exceptionally strong, and was known to throw around a swear word or two. On my first day of work, I was placed as an apprentice cabinet maker under Bob, an ex-con with a full face and neck beard, a body full at tattoos, and IQ of around 70.
I have always been able to roll with punches and get along with pretty much everyone, so I was confident that Bob and I would get along fine. Growing up a tomboy and enjoying the company of the opposite sex, definitely helped me survive my time at Rocky Mountain Furniture for a year and a half. I suffered practical, and off-colored jokes, sexual innuendoes on a daily basis and par-took in life threatening nail gun wars when the boss was out of town. I sanded until my fingers bled, swept up the shop everyday while my co-workers smoked themselves silly and perched their asses on overturned 5 gallon buckets while wolfing down a donut purchased from the roach coach, which they eagerly awaited everyday at 9:00 am and 1:00 pm sharp. I was forced to keep the bathroom clean if I wanted to avoid any number of diseases which might have been contracted from my less than sanitary co-workers.
At the end of my tenure, I left with biceps that had easily doubled in size, a new appreciation and love of bluegrass music, a vocabulary that would make a sailor blush, and all ten fingers. Oh, I also had learned a thing or two about woodworking. I was proficient on almost all machines, could find my way around a blue print, was a master at sanding and preparing cabinets for the finishing room, and had refined my hardworking attitude. But above all, I was certain that woodworking was for me. I felt exceedingly happy to have something to show for my efforts at the end of the day. Creating was in my blood. I was also blessed to graduate from Bob, and join a journeyman named “Chief” who became not only a mentor, but a friend. He was kind of like an old Uncle who has been banished from the family for his bad temper, fondness for the drink, the ladies and his habitual cigarette of which one was always hanging out of his mouth and/or burning in an ashtray in more than one area. But Chief was a gentleman, well read and an accomplished luthier. His specialty was guitars. He often asked me to come be his apprentice luthier, but guitar making is too structured and detailed for me. He taught me the finer side of cabinet making and we had great fun collaborating on “G-jobs” we built while on the clock. I am indebted to Chief for giving me the confidence to leave Rocky Mountain Furniture when it was apparent I had become increasingly agitated with my work environment and had learned about all I was going to learn from making boxes with a bunch of ill-mannered hacks, Chief excluded of course. He saw potential in me to take my talent to another level, even though it meant we would part ways.
My next stop was to work for a man named Matt. He owned a small shop and mainly built kitchens and other large in-home cabinets. When I say small, it was just he and I a lot of the time. Occasionally he would hire someone to help me, but they didn’t last that long. Which was fine with me, because I discovered that I really enjoy working alone, and I am not too fond of bossing someone around. I did however enjoy working with a best friend from high school and a college roommate who I encouraged to apply.
Keith had just moved to Boulder and was once again my roommate, and had as yet had not found gainful employment. I am not going to pretend it was always easy working with Keith, but we did have our fair share of hilarious moments. Some of them are really only funny now that time has past. Like the time I got so angry I hucked a small brush in his general direction, smashing it to pieces. I can’t really remember what pissed me off, but I think it was that he would not listen to my direction while routing, wanting to do it his way, which of course was incorrect, and he ended up ruining the piece.
Or when we were building a complicated angled, two piece laminate counter top and messed up on sticking one big sheet. The boss was out of town and we were to install the counter top in a couple of days. So we had to frantically call around for some more laminate, and pay for it out of our own pockets so Matt wouldn’t find out. As murphy would have it, the new sheet that came was a about 1/16 thicker than other sheet, oh bugger! Somehow we managed to make it turn out and Matt was none the wiser. I am reminded constantly an old woodworker once told me, “mistakes are part of woodworking, it is not when they will happen, but how you fix them that is important.”
I learned some very valuable things working for Matt. I gained a lot of confidence in my ability right away, because he would leave me drawings with minimal explanation and then leave to tend to clients or hustle up other work. He rented this little shop from a contractor friend of his, out in the middle of rural farm country. It was probably 650 sq. ft. at best, but we had all the necessary tools, even if space was a premium. Being by myself most of the time meant that I had to figure out how to manage things like cutting up a full sheet of particle board on my own with our old powermatic table saw. I worked smarter not harder, and became a master at using leverage to move things around. I also learned the art of installing cabinets on the job site, how to spray lacquer, how to build a project from start to finish. Creating a cut list, buying the material, cutting up parts, assembly and finishing. I also realized that building kitchens was not for me. What really gets me going is building furniture.
But a pay check is a pay check. Today I have a little bit of flexibility in the kind of work I take on, and kitchens is not one of them (unless it is for myself). I figure there are other shops that specialize in kitchens, keep up on the latest hardware and designs making them better equipped to fill that need.
I lasted with Matt for about a year, at which point my boyfriend and I decided to move back to California and get married. We moved to Paradise, Ca, nestled in the pines above Chico in the Sierra Foothills. I waited tables and did woodworking on the side. I created my own company called Naked Tree Woodworking. The name came to me while walking in the forest one day in Colorado and while looking a some beautiful old dead trees, I decided that wood used in furniture making is essentially naked, stripped of its bark. Fresh and beautiful displaying its beauty from the inside out. I have received many comments over the years because of the name as you can imagine. A lot of women have been compelled to call because they have found the name fun and then are doubly excited because I am a women.
After 2 years in Paradise, we decided to move to Grass Valley, Ca and put down our roots for good, at least for the foreseeable future. My father was nearing retirement from a long career with IBM and I was eager to have him move back to California to join my woodworking efforts. Throughout my life, I have watched my dad in many artistic endeavors, whether it be making a leather chair in the 70’s or a set of leather britches with big lips on the front for my sister, to progressively more advanced projects like a beautiful free standing CD cabinet with an intricate carving of a violin on the doors. We each had something to offer to create a successful woodworking business. I with my cabinet making skills and knowledge and my dad with his creative mind and can-do attitude. He would also come to be the financial backer, and purchaser of equipment. We actually bought our first big piece of equipment in Boulder, a beautiful Delta table saw! In my opinion, if there is one tool every shop needs, especially in cabinet making, it is a table saw. They are however not cheap. Most good tools aren’t, but if they are taken of, they will last forever.
Once settled in Grass Valley, we created a functional shop in a 2 and a half car garage on my dad’s 11 acre piece of land. We are nestled in the pine and oak forest of the Sierra’s with a magnificent view and peaceful surroundings.
Today we have a spacious, well designed 1400 sq. ft. shop with every piece of equipment and tool we need. I am rarely happier than when I am toiling away in the shop, listening to music and harmonizing with the wood!
One of the greatest tools in life is to be able to listen to that inner voice. While I am still striving to accomplish that more, I am certainly grateful I did on the Spring day so many years ago.

